


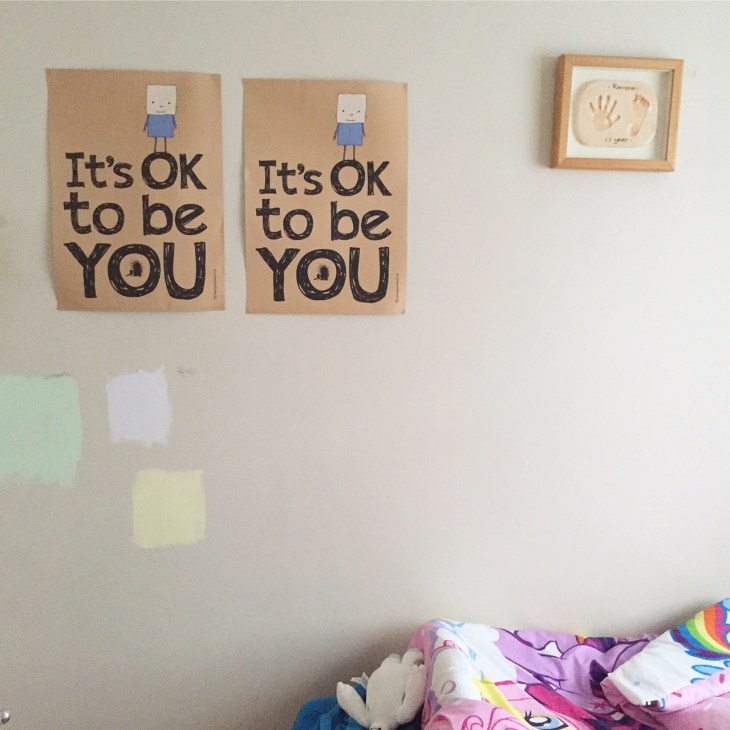
But it’s not OK to have such a dreadfully dull wall colour. Not when you’re six, anyway.
So, you might remember we were kindly approached by Dulux to try out some of their Endurance+ range paint as part of their campaign to overhaul kids’ bedrooms and let them be part of the process of creating their personal space – a laudable aim and one which I only put a few parental parameters on (I cannot live with pink, I just can’t).
We settled on sunny Vanilla Sundae, a fairly bright yellow, that would add a bit of spark to the room – which doesn’t get much natural light – without being eye-watering. It’s not a big room, just 10′ x 8′ and the ceiling isn’t very high, being a pretty squat 1960s build, so we settled on 5l of paint. We didn’t need to do an undercoat, as the original wall colour was pretty light, but there were some test patches of paint to cover, as you’ll see in the ‘before’ shots. It wasn’t until I had to take those that I realised how embarrassingly drab we’d let the room get; so much so this is about the only ‘before’ photo I can bear to publish. When we first moved in, hurriedly, it was the first room to get a quick dash of paint, a new wardrobe and a pair of curtains, just so we could get our then-toddler settled in. Now a newly minted year 2, with a wall full of certificates for this and that, drawings and posters (Tangled, My Little Pony, Squarehead and Marvel superheroes all represented), the flat calico and basic bed suddenly seemed a pretty poor reflection of the cool, grown-up girl our little dynamo has become.

We started with the usual prep and masking off, and she wanted to get stuck in immediately. While we got to work with the rollers, we shoved a paint brush into her hand and got her to go around all the little masked-off bits in the room – around power sockets, thermostats etc – and she started work on the pipes. When we moved in, we had to add a new gas supply to the house, and the copper piping has been exposed ever since, and not in a cool, steampunky sort of way. While the paint is not designed for that particular job, we glopped a generous layer on and it worked surprisingly well.

The first coat went on pretty quickly, and were it not for the test patches we might well have got away with one coat as it had very good coverage. We left it for the minimum four hours the tin recommends, before adding another coat; this was a bit trigger-happy, as we created some patchy bits by getting ahead of ourselves (our fault, as it was a fairly damp day, so we should have gone for more than the bare minimum time). After leaving this second coat overnight to dry out thoroughly, we made some touch ups in the morning and… boom. Job done.
Best of all, although we’d packed R off to the grandparents the night before so she wasn’t sleeping in a wet-walled room (just enough time for me to barrell through a fat Sarah J. Maas number), she was able to move straight back in on the Sunday night, since the paint has a very faint smell. While it gives off just a bit of a painty, yeasty vibe, it’s not at all unpleasant or unmanageable, and since none of us are prone to reactions to these things we were all very happy for her to sleep in there with just cracked-open windows to encourage thorough drying. All in all it was an exceptionally easy process – and it turned out that 5l was just spot on for two coats and touch ups – in fact, there’s just enough left in the can for anything else we spot. It’s dried to a lovely even yellow, slightly brighter and deeper than the colour on the can – a really Fluttershy shade.

Going just a tad further than we’d requested…
We have more changes to make to her room, including the addition of an amazing Teen Titans Go! wall sticker, though we’ve been advised by the sticker manufacturer to leave newly-painted walls to dry out thoroughly over four weeks before whacking it on. I christened the process by surprising R with a lightbox and letters – with some colourful ones on order too – which I think all adds to the theme of light and colour which we’re really going for. Her new cabin bed was paintstakingly assembled and yes, she does do her homework in there, sat at the pull-out desk from the bed she chose, in the light of a room that is painted in a cheery colour she picked under the purple lampshade that was her preference. While it’s now crowded with boxes and books until we work out the best storage arrangements (hence no photos: I have my pride!), finally the beginnings of her personality are stamped on her own space – a privilege I didn’t realise I’d been denying her.

We’re really happy that Dulux gave us a shove over the finish line. I have a plan in my head for our living room now (pale mint green walls, pale grey bookshelves, mustard cushions) but since it involves some purpose-built shelving and a new sofa it might have to wait a year or so for some hardcore saving…
Disclosure: The paint was provided for us by the Dulux team, but everything else down to the rollers and opinons is ours.

Looks cheery, sunny, and joy-filled! Some day I may paint a room again. Inspiring!
Aw, thank you! It has made me think about being more bold in shared family rooms too… x